Authorizing Shopify
This guide is a two-step process. We'll first need to create a custom app in the Shopify Developer Dashboard, then we'll authorize Shopify with that app data in SixBit. Before continuing further please make a SixBit backup of your database (We cannot stress making a backup of your database enough). Make sure SixBit is on the latest beta release (5.00.004, Click here to manually Download). You can download the latest release from the Dashboard or the Support tab in SixBit. Once upgraded, you can now continue and follow the guide below.
Activate the custom app developments from the Shopify Administration page
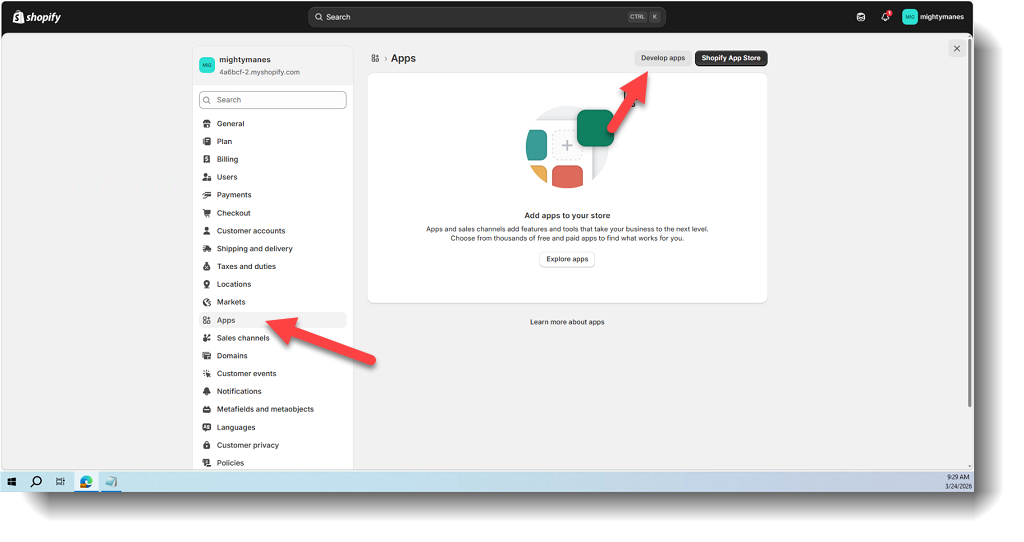
- From your Shopify admin, click Settings > Apps.
- Click Develop apps.
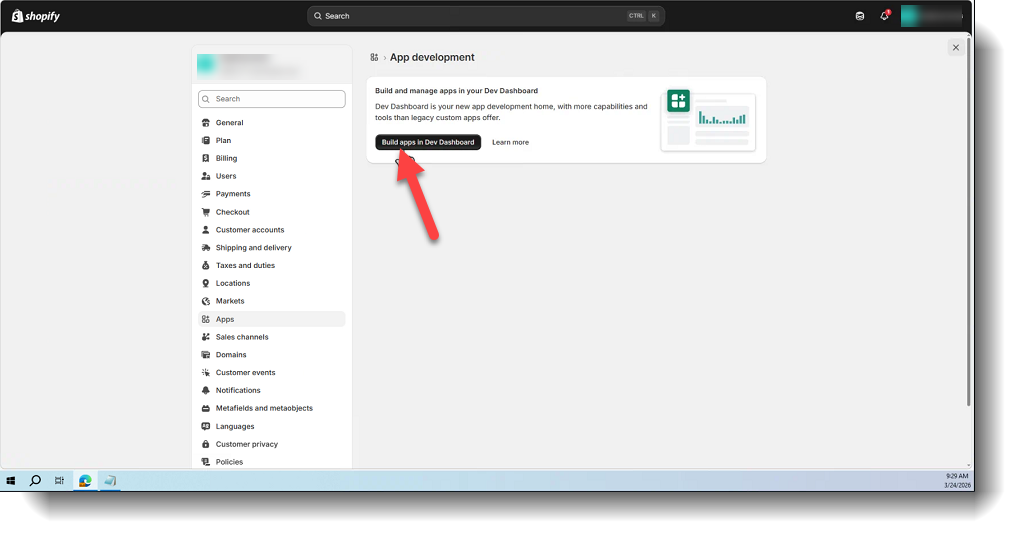
- Click Build apps in Dev Dashboard.
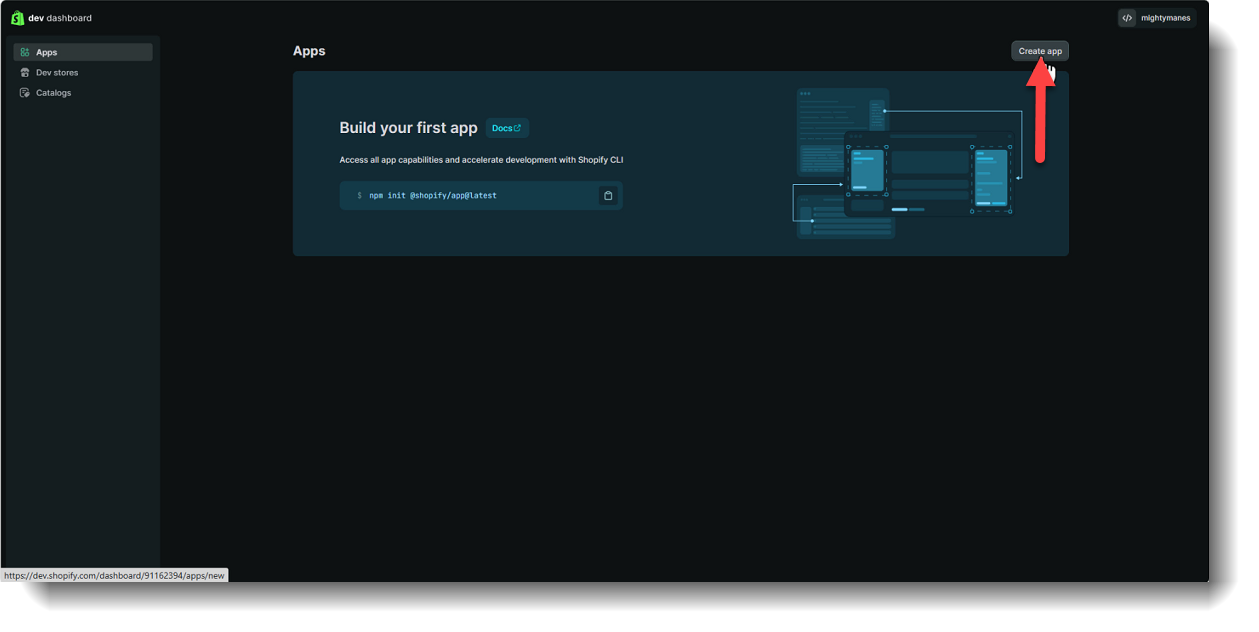
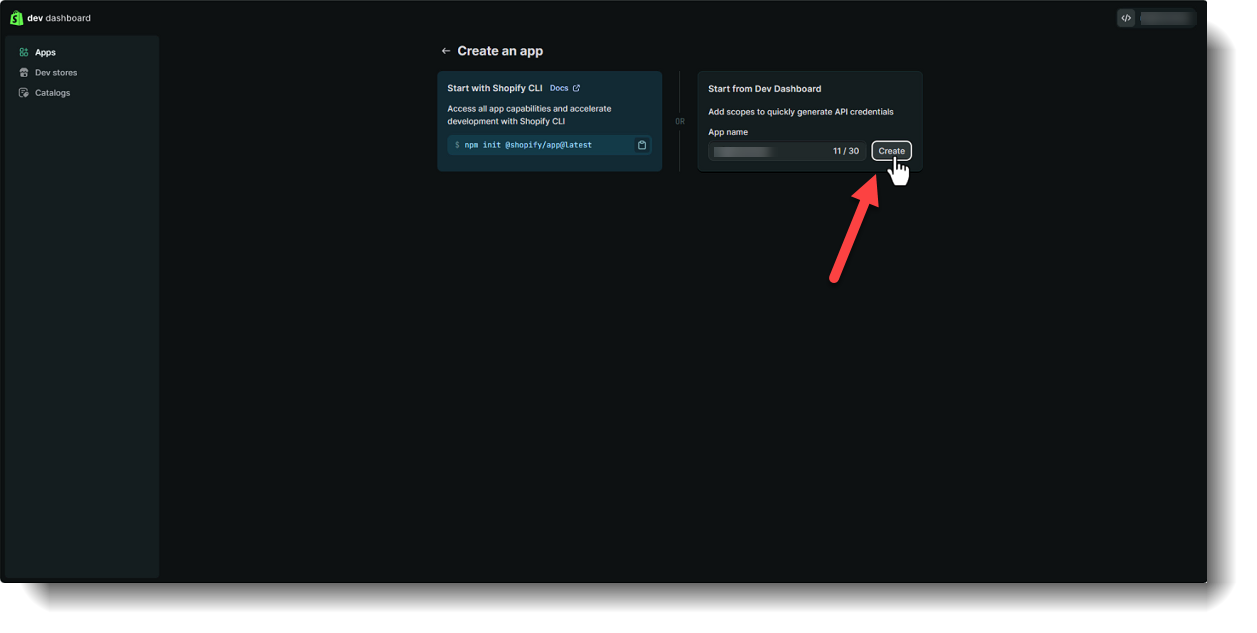
- In the Dev Dashboard, click Create App.
- Under Start from Dev Dasboard, enter the App name (this needs to be your store name or else it won't work), then click Create.
- Scroll down to Access
.- We'll need to add the below list of scopes here for all Shopify traffic to work. You can copy and paste the list of scopes into the Scopes field. Then click, Release.
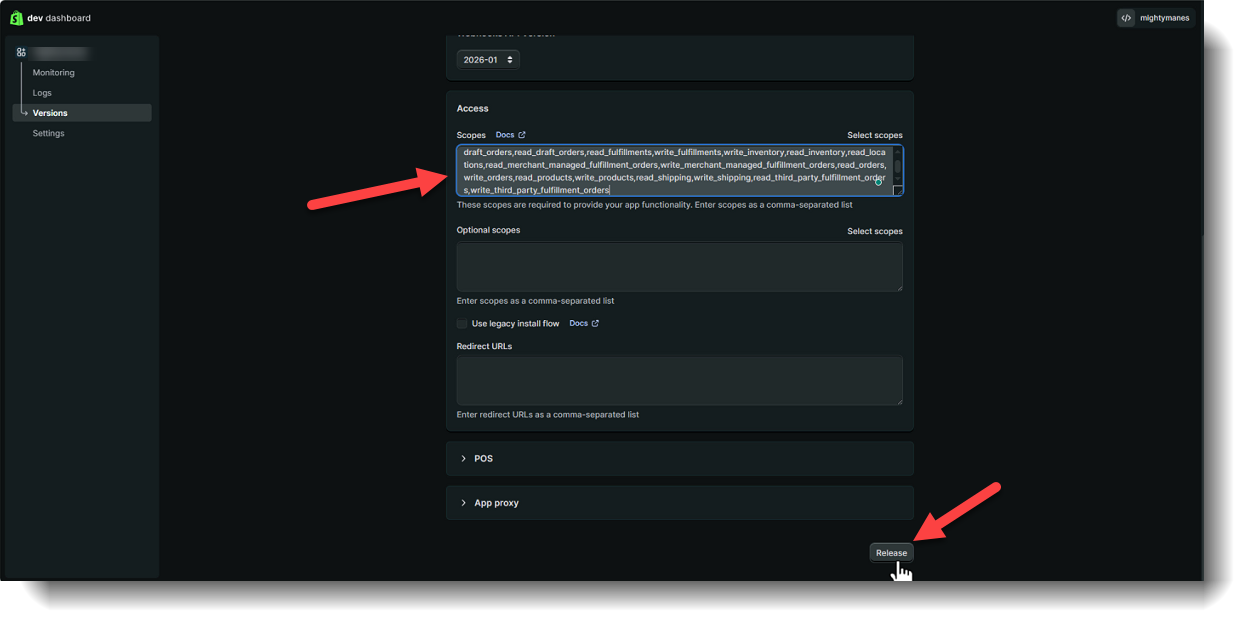
The list of scopes that will need to be added are:
read_assigned_fulfillment_orders
write_assigned_fulfillment_orders
read_customers
write_customers
write_draft_orders
read_draft_orders
read_fulfillments
write_fulfillments
write_inventory
read_inventory
read_locations
write_locations
read_merchant_managed_fulfillment_orders
write_merchant_managed_fulfillment_orders
read_orders
write_orders
read_products
write_products
read_shipping
write_shipping
read_third_party_fulfillment_orders
write_third_party_fulfillment_orders
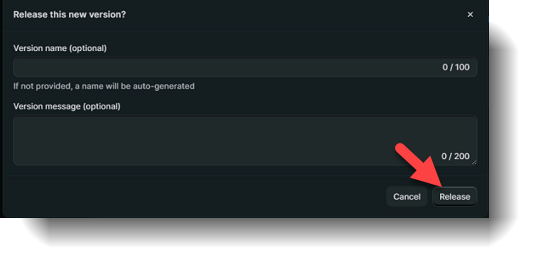
- You will be prompted to enter a version name and comment which are optional. When finished click, Release again.
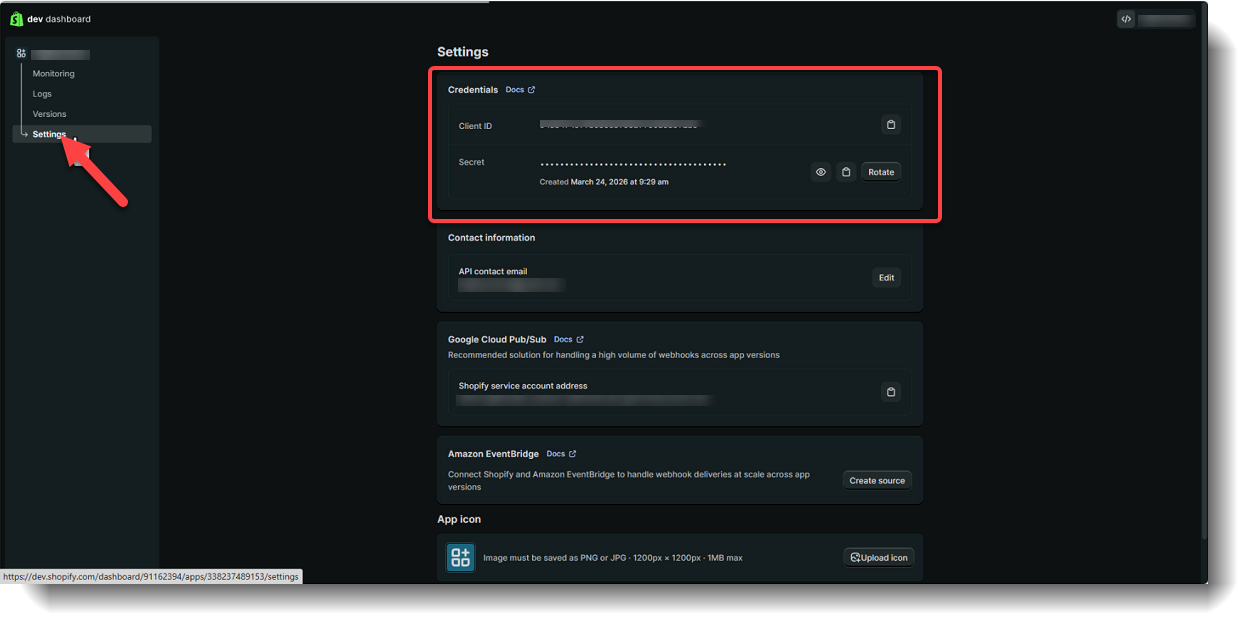
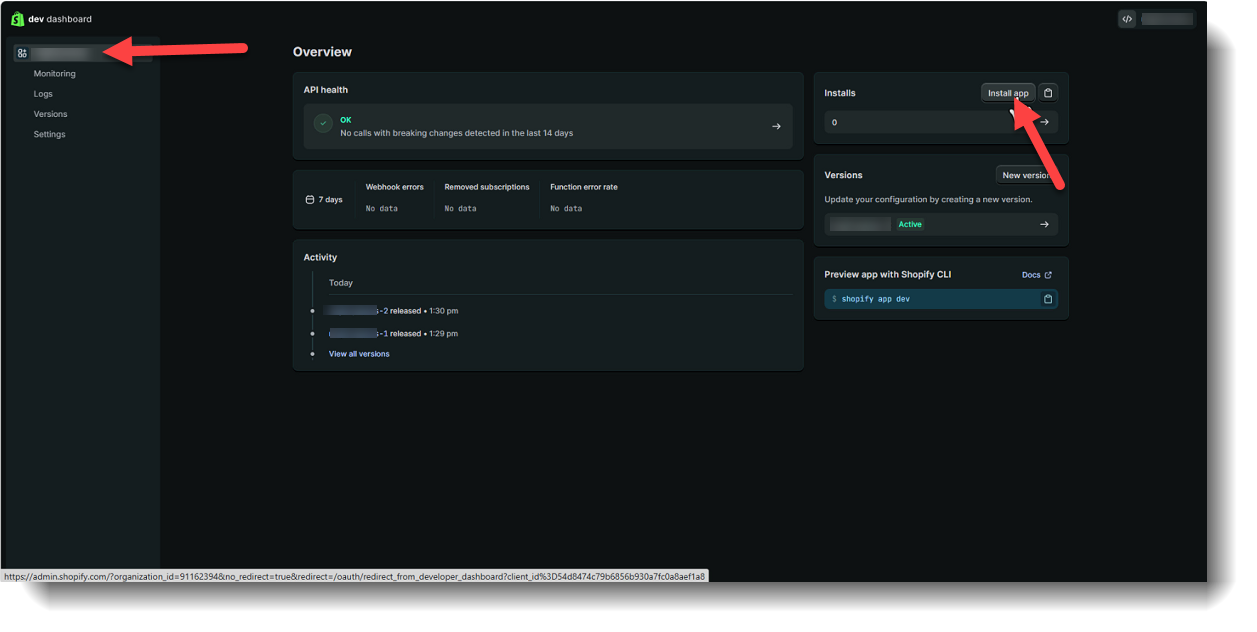
- Click on Settings and copy your Client ID and the Secret API access token to enter into SixBit later.
- Click on your Application name and then Install App. This will prompt you to select your store and then return you to the Shopify Admin page to see and finish installing your App.
- Click on Settings and copy your Client ID and the Secret API access token to enter into SixBit later.
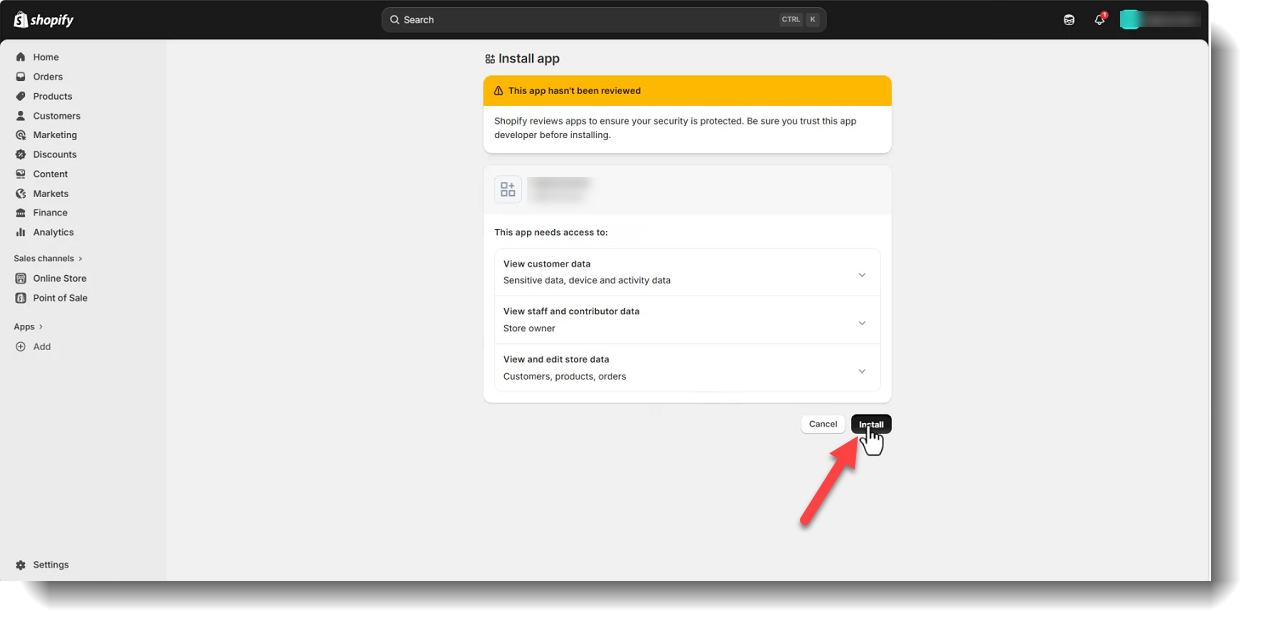
- The last step on Shopify is going to be to click Install on the admin page to complete the app creation. From Shopify return to SixBit to complete the authorization.
Plugging in API key and store name into SixBit for New Shopify Users
- The final step here would be to plug in the API key and store name you copied from the steps above into SixBit during authorization
Open the File/Application Menu (the File button or the little orange guy in the top left corner of SixBit) > Options > Sites tab and enable Shopify
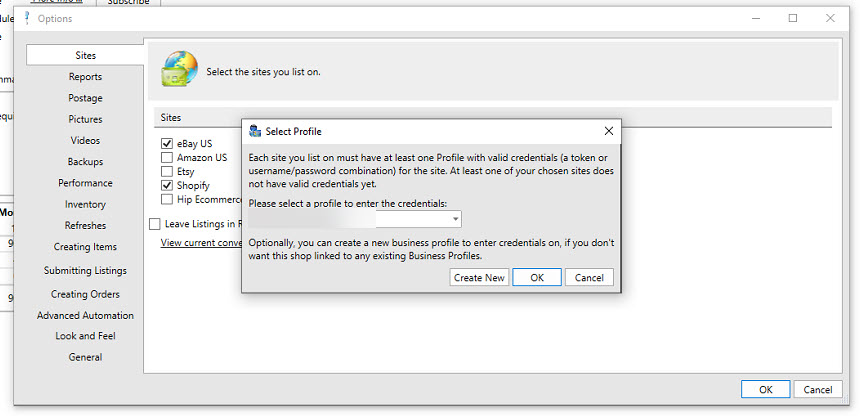
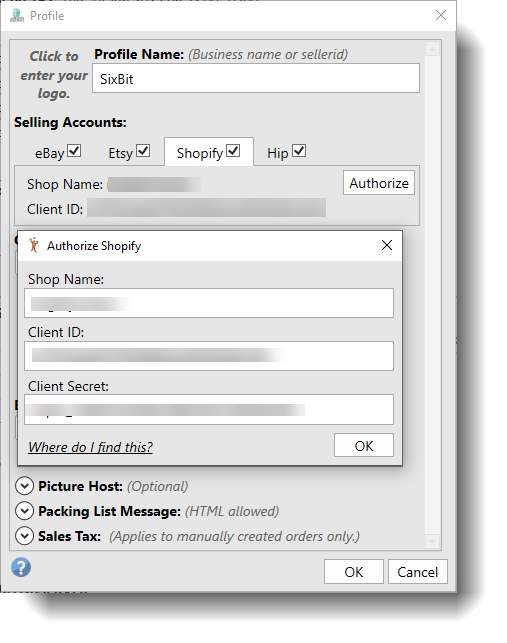
- Finally, once Shopify is enabled choose the Business Profile to link your Shopify store to, click OK and you'll be prompted to enter in your Shop Name, Clent ID, and Shop Secret (aka the API Token).
Shopify will now work in SixBit to list and import data from. Please email support@sixbitsoftware.com with any further questions or issues here.
Plugging in API key and store name into SixBit for Existing Shopify Users
For existing users you simply need to reauthorize the Shopify profile and SixBit will allow you to enter the new API key (Shop Secret). In SixBit click the File/Application (the File button or the little orange guy in the top left corner of SixBit) > Manage > Profiles and select the profile that has your existing Shopify store. Once the profile is open, click the Shopify tab and click the Authorize button. You will also be prompted to enter the Client ID , Shop name and Shop Secret as advised above., then click OK.