Editing a Compatibility Set
To edit a compatibility set:
- Open the Manage Compatibility Sets window. How?How?
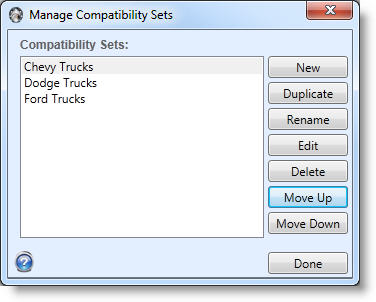
- Select the compatibility set you would like to edit. Click the Edit button. The Compatibility Set Editor will open.
Alternatively, compatibilities can be managed from File Menu|Manage|Presets|Compatibility Sets. Refer to Managing Presets for more information on the Manage Compatibilities window.
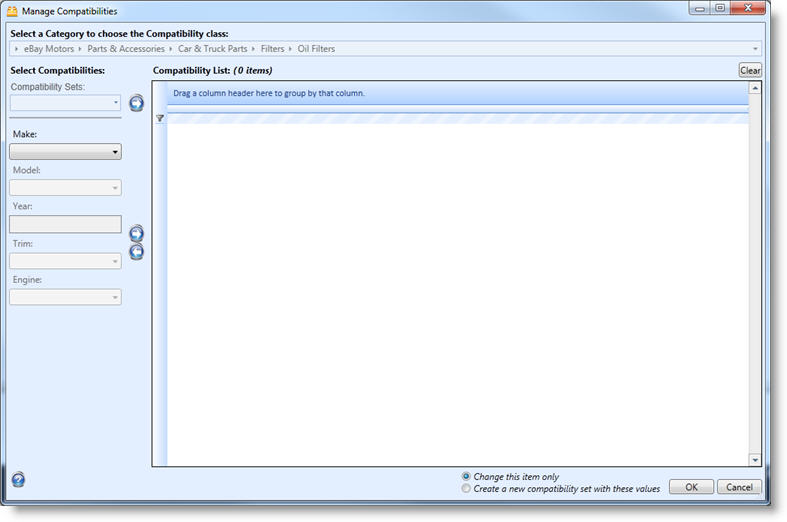
If called from an item, the category chosen on the item will appear in the "Select a category..." drop down. This will determine the compatibility fields that will be available to fill in (i.e Make/Model/Year/Trim/Engine). If the editor was opened from the Manage Compatibilities window, the category needs to be specified.
If there is an existing compatibility set that will be added to this set, choose it from the Compatibility Sets drop down and click the arrow to the right of it to add it to the list.

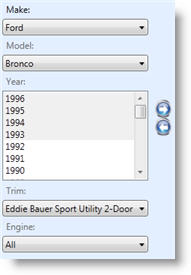
For any additional entries, choose a value for each of the compatibility fields. In this case, Make/Model/Year/Trim/Engine. Note that in the Year selection, multiple entries can be selected by using Shift-Click or Ctrl-Click. When finished, click the right arrow next to the fields to add them to the list.
At any time, a row can be selected in the compatibility list and the left arrow button can be used to remove it from the list.
Once a row has been added, notes can be added by right clicking the row and selecting Change Notes.
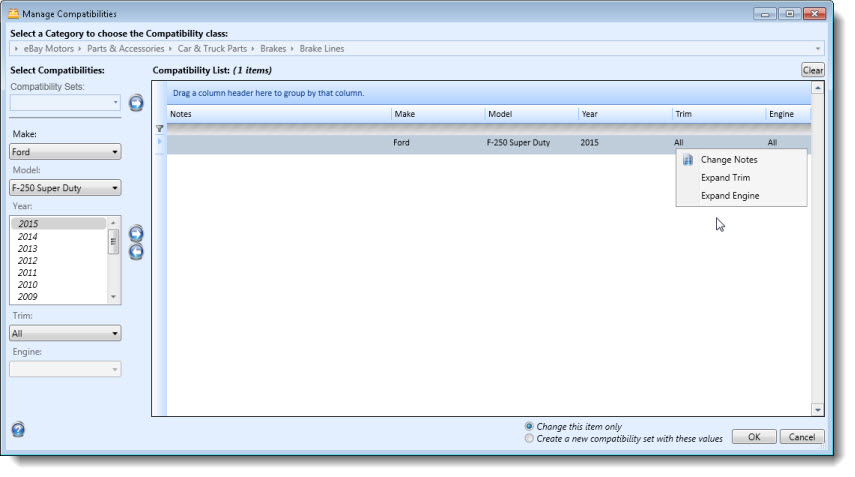
If All was chosen for Trim or Engine, the values can be expanded by choosing Expand Trim or Expand Engine. When this is performed a separate row will be created for each trim or engine. This is useful to select all trims/engines and then remove only one or two rather than having to select all the desired trims/engines individually. The following example shows the Trims expanded.
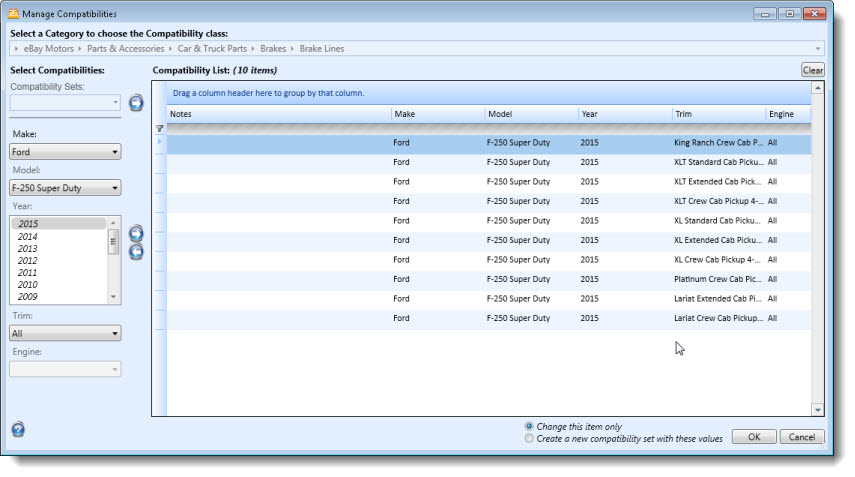
When all compatibilities have been added, choose a save option in the footer.
![]()
To simply save these compatibilities with the item, choose Change this item only and click OK. To save these compatibilities as a named set to be used later, choose Create a new compatibility set with these values and then click OK. Enter a name for the compatibilities. The compatibilities will then be saved and sent with the item when it is submitted.