Managing Payment Services
Most eCommerce sellers use at least one payment service (like PayPal) to accept payments electronically. Payment Services make it easy to accept payments and in return charge a fee for their service.
eCommerce sites integrate with these payment services to allow for payment through their sites and also will interact with the payment service to report the payment processing fees back to the seller. There are some cases, however, when the passing of the fees from the payment service back through the site can provide unreliable data. It is much more reliable for SixBit to retrieve the fees directly from the payment service.
In order to retrieve the fees directly from the payment service, SixBit must be authorized to interact with the payment service on the sellers behalf. Once SixBit is authorized to retrieve the fees directly from the payment service, it will automatically go to the payment service site to get the fees for all sales linked to that service. Each account the seller has on the payment service will need to be authorized.
To authorize SixBit to retrieve fees from a payment service:
- Open the Manage Payment Services window. How?How?From
the File Menu in the top left, select Manage and then
User Permissions.
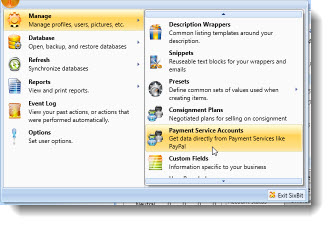
- Click New to create a new payment service.
- Enter a name for the Payment Service. We recommend you use the name of the payment service followed by the account name on the service. For example "PayPal - myemailaddress@yahoo.com".
- Select the Payment Service from the dropdown. Different information is required for different payment services. Instructions for each payment service follow.
Entering PayPal Payment Service Authorization Info
PayPal requires your PayPal email address, API username, API password, and API signature.

Enter your email address and follow these steps to find the API username, API password, and API signature.
-
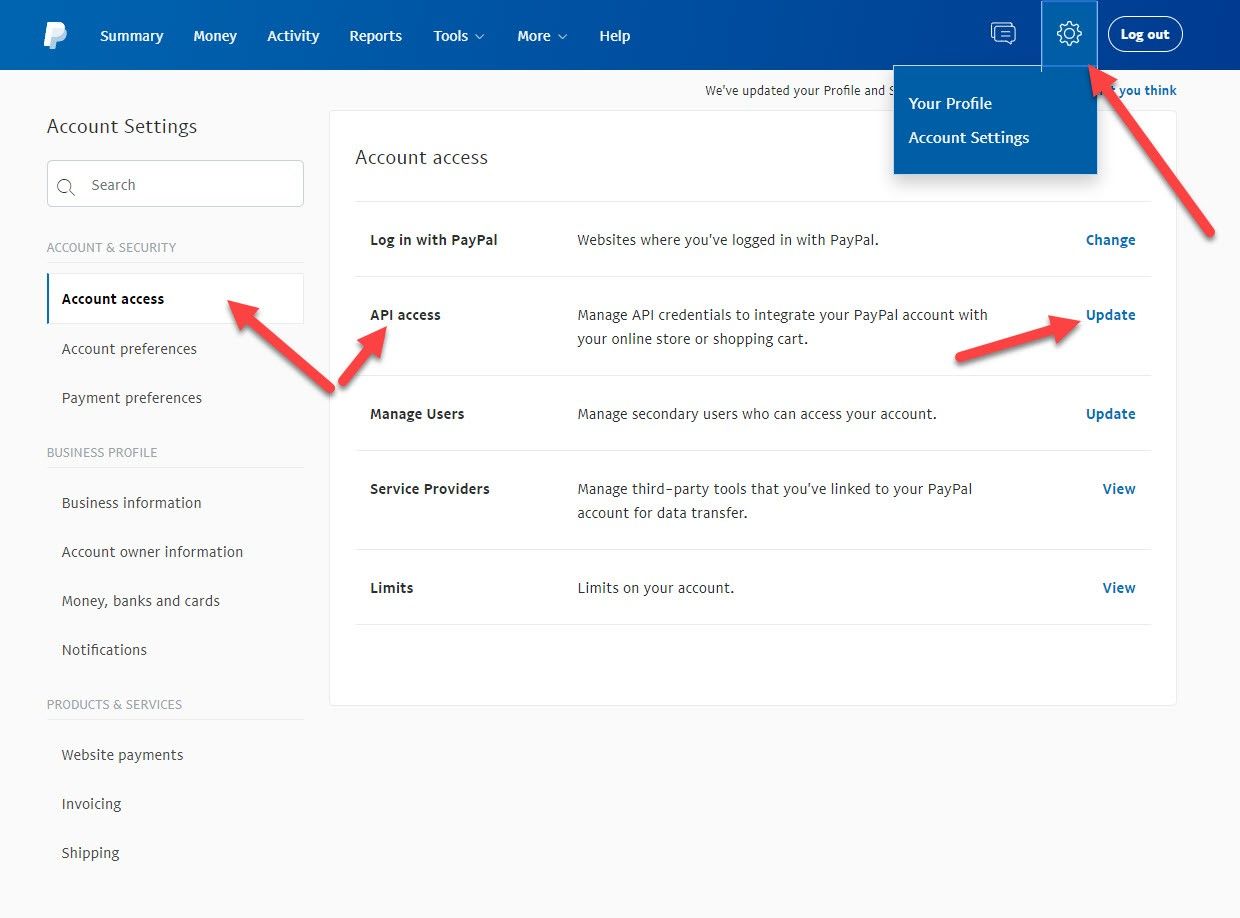
- Login to your PayPal account.
- From the home page, select Seller Preferences.

-
- Under Account Access, select the Update link next to API Access.
-
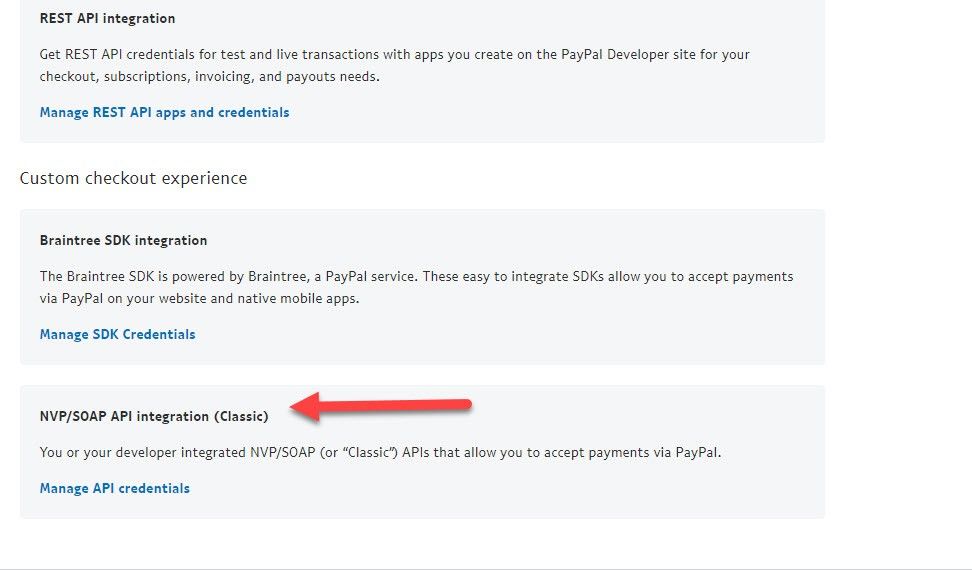
- Select Manage API Credentials under NVP/SOAP API integration
-
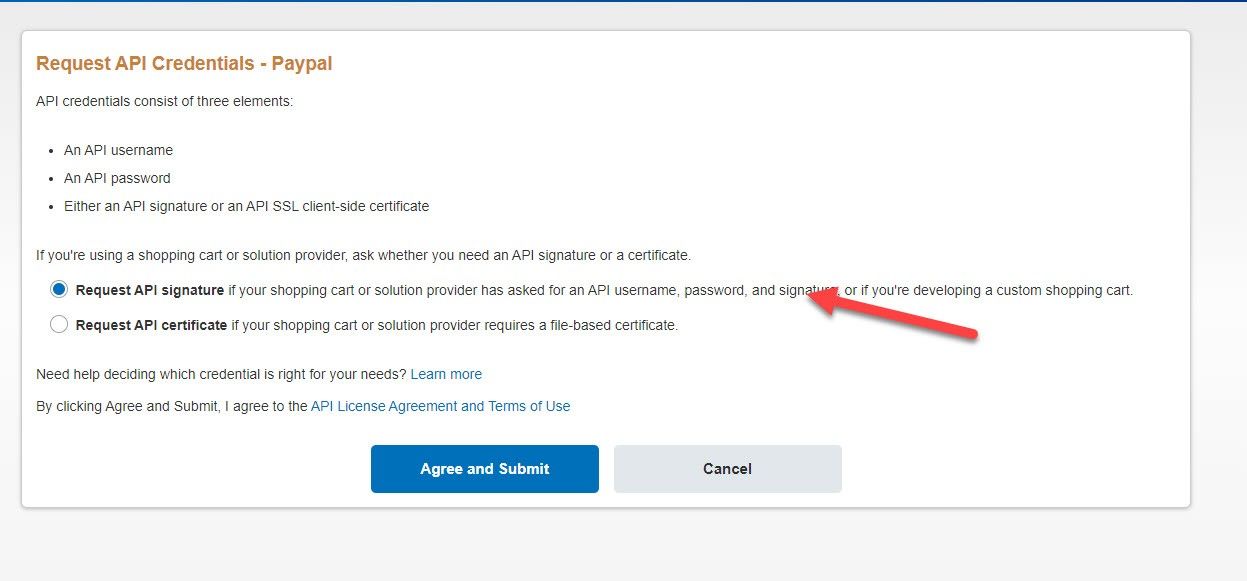
- Leave the Request API Signature option checked and click Agree and Submit.
-
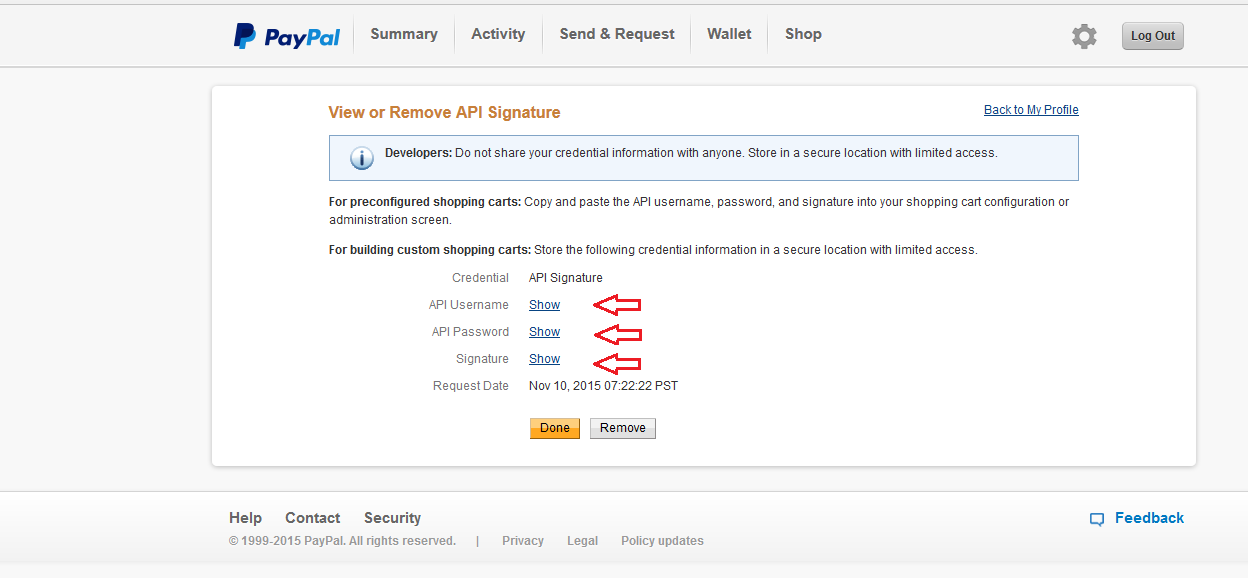
- On the resulting window you will see a Show link next to each of 3 labels. Click the link to display the values and then copy and paste the values to their corresponding fields on the Payment Services window.
-
- Click OK when finished.