External Picture Storage
As mentioned in other topics, SixBit stores the pictures in the database. This is only partially true. Ideally, storing pictures in the database makes for a much smoother method of sharing pictures between multiple users. The only time this becomes an issue is when pictures make the database grow to nearly 10GB (the limit of the free version of SQL Server). If the database is approaching that limit and purchasing the Standard version of SQL Server is not an option, then the option to have SixBit store the pictures on the hard drive is available.
Note that this only changes where SixBit internally stores the pictures. It does not make the pictures accessible to the user in any fashion other than if they are stored in the database. SixBit is just internally changing where it gets and places pictures to allow users to shrink the size of the database.
Pros and Cons
Storing pictures on the hard drive has the benefit of making the database much smaller, however, it does come with some caveats.
First, if pictures are stored on the hard drive, then other users sharing the database will not be able to view the pictures without changing some manual settings. If pictures are stored on the hard drive on the server, then the server must share that location with other computers on the network. Any user who wants access to the pictures will need to specify the location of the stored pictures.
Second, when pictures are stored on the hard drive, pictures can only be shared with other users on the same local area network.
In short, users should store the pictures in database and only change to hard drive storage if their database is growing too large (10GB).
To move picture storage to the hard drive:
-
Open the SixBit Options window. How?How?
-
Select the Pictures tab.
-
Select the Management tab.
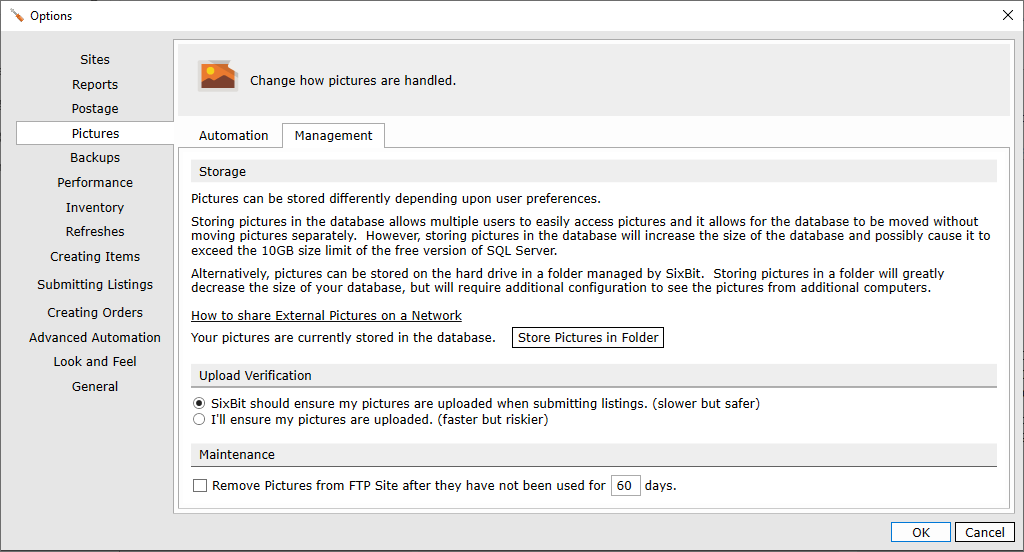
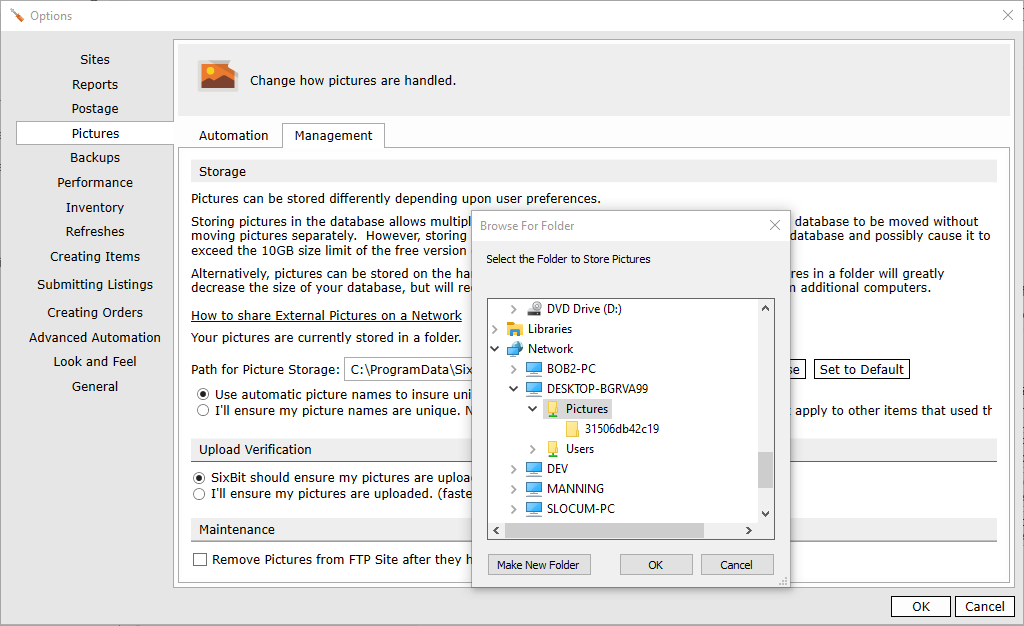
- Click Store Pictures in Folder to begin the process of moving the pictures.
- Choose the location to place the pictures from the window that appears and click OK. A default location has been chosen and should be used unless you have a specific reason to store the pictures elsewhere.
- Click Yes on the Moving Pictures to Folder window.
- Depending upon the number of pictures in the database, the process can take from several minutes to several hours. When finished, the option to compact the database will appear.
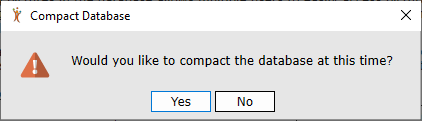
Compacting the database will remove all extra data associated with the pictures still stored in the database. Compacting the database is recommended unless the database is being used by other users or processes. The database can always be compacted later from the left hand sidebar of the Support Mode.
- After the pictures have been moved, the Management tab, will show the details of the location where the pictures have been placed.
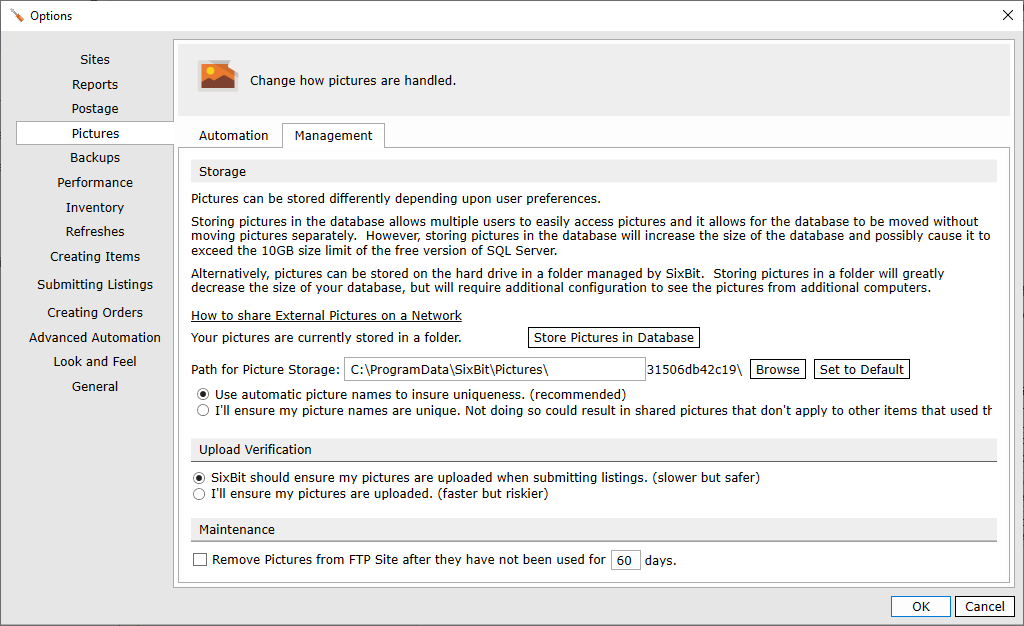
Notice that SixBit has added a subfolder to the specified location. In this case, the subfolder is called "31506db42c19". This location is only important if you need to share the pictures with other users on the network. If so, the specified folder should be shared with the appropriate users. Likewise, when other users want to reference the pictures, they will need to specify this folder.
To move picture storage from the hard drive back into the database:
-
Open the SixBit Options window. How?How?
-
Select the Pictures tab.
-
Select the Management tab.
-
Click Store Pictures in Database. If this button is not available, then the pictures for this database are not stored on the hard drive.
-
Click Yes on the Moving Pictures to Database window that appears. Depending upon the number of pictures, this action may take from several minutes to several hours.
Sharing the folder that contains the pictures will be different depending upon your operating system and who you want to share the folder with. The following example demonstrates how to share the picture folder with Everyone on a Windows 7 computer. The process is similar for other Windows operating systems. Please consult your operating system documentation to learn more about sharing folders.
To share the pictures folder from the server:
-
Navigate to the parent of the folder specified as the Path for Picture Storage. For example, if the Path for Picture Storage Path is C:\ProgramData\SixBit\Pictures then navigate to the C:\ProgramData\SixBit folder.
-
Right-click the folder that contains the pictures and choose Properties.
-
On the Properties window, select the Sharing tab.
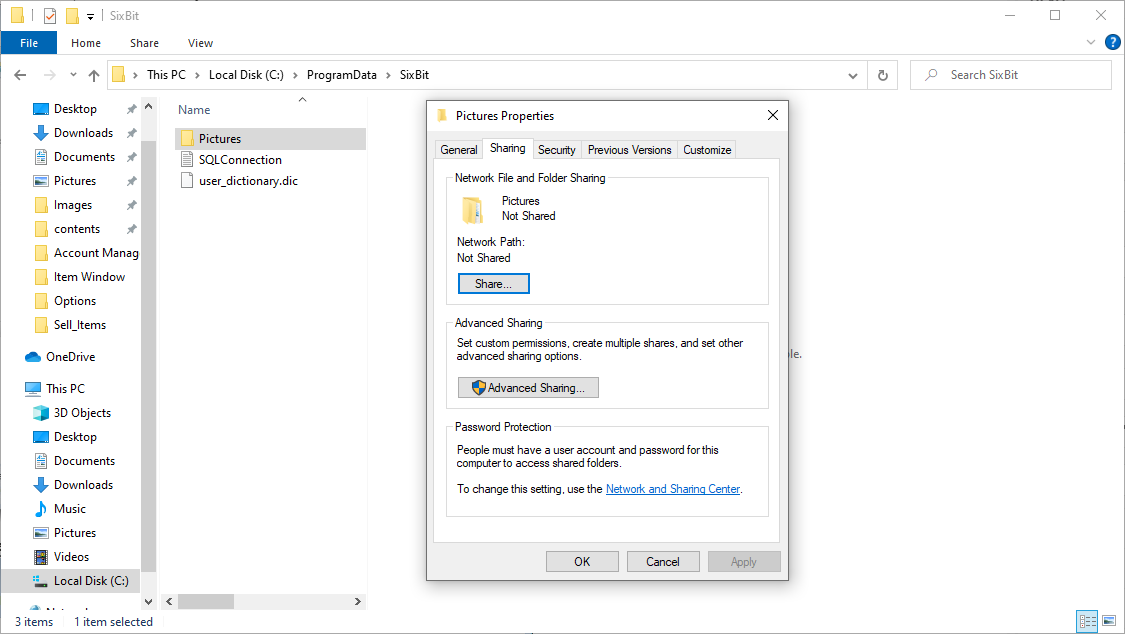
- Click the Share button.
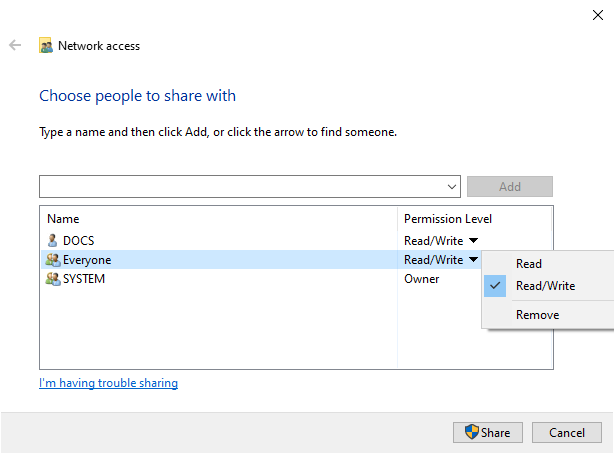
- Select the user or user group you want to share the folder with, then right click and choose Read/Write permissions.
- Click Share.
- Click Done.
- Click Close. The folder will now be accessible from the other clients. You must go to the other clients and specify the location of the pictures.
To access hard drive pictures from a client:
-
Open the SixBit Options window. How?How?
-
Select the Pictures tab.
-
Select the Management tab.
-
Navigate to the folder on the network that contains the pictures. You can find the folder from the SixBit Picture settings on the computer that is hosting the pictures. The folder containing the pictures must be shared as described in To_share_the_pictures_folder_from_the_server:
-
Click OK.
-
Click OK to close the Options window.