Managing Emails
Built In Emails
There are 4 types of emails built into SixBit. They are:
- Invoices
- Payment Acknowledgements
- Shipping Notifications
- Feedback Reminders
These emails are built into the Ship Orders process and can be customized by the user. In addition to customizing the text, emails can be set to be sent automatically. Please see Customizing Invoices, Customizing Payment Acknowledgements, Customizing Shipping Notifications and Customizing Feedback Reminders for more information.
Custom Emails
In addition to the built-in emails, Small Business users and higher can create their own custom emails. A custom email can be created for marketing purposes, or to send holiday greetings, etc. to your previous buyers.
You can add, edit, rename, delete and send custom emails.
To add custom emails:
- Open the Ship Orders mode. How?How?
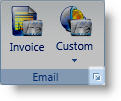
- Click the dialog launcher from the Email group on the ribbon bar to open the Manage Email Templates window.
- From the Manage Email Templates window, select New.
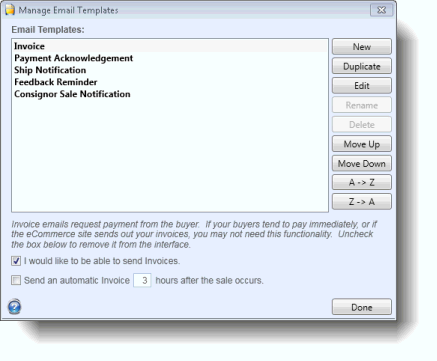
You could also have selected an existing email and clicked Duplicate to use the existing email as a starting point.
- A prompt will be received to enter a new email name. The email name should be descriptive to differentiate it from other emails that will be sent. Click OK to continue.
- The HTML Editor will appear and allow the content of the email to be entered. Refer to Using the HTML Editor for more information on all the features included in the editor.
- Click OK when finished.
To edit custom emails:
- Open the Ship Orders mode. How?How?
- Click the dialog launcher from the Email group on the ribbon bar to open the Manage Email Templates window.
- From the Manage Email Templates window, select the email you want to edit and click Edit.
- The HTML Editor will appear and allow you to edit the content of the email. See Using the HTML Editor for more information on all the features included in the editor.
To rename custom emails:
- Open the Ship Orders mode. How?How?
-
Click the dialog
launcher from the Email group
on the ribbon bar to open the Manage Email Templates window.
- From the Manage Email Templates window, select an email from the list and click Rename.
- Enter the new name and click OK.
To delete custom emails:
- Open the Ship Orders mode. How?How?
-
Click the dialog
launcher from the Email group
on the ribbon bar to open the Manage Email Templates window.
- From the Manage Email Templates window, select an email from the list and click Delete.
- Verify you want to continue and the email will be deleted.
To send custom emails:
- Open the Ship Orders mode. How?How?
- From the grid, select the orders for which an email will be sent.
- Click the arrow under the Custom button from the Email group on the ribbon bar.. A list of your custom emails will appear.
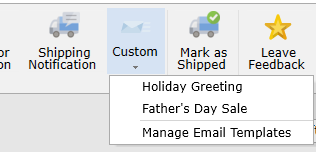
- Select an email from the list.
- The email preview window will load. Click Send or Send All to send the email(s).