See Also
- Adding Notes to an Item
- Adding Inventory Information on an Item
- Adding Weight and Dimensions to an Item
- Adding an Item from an Item Template
- Adding an Item from Scratch
- Creating Items
- Deleting Items
- Duplicating Items
- Entering Listing Upgrades
- Entering eBay Listing Information
- Entering eBay Shipping Information
- Entering Payment Information
- Entering Item Data
- Importing Data into SixBit
- Saving an Item as an Item Template
- Entering Title and Description
- Entering an Allocation Plan
- Entering Etsy Information
- Entering Product and Shipping Info
- Entering Tags and Materials
- Entering Categories and Attributes
- Entering Item Specifics
- Entering eBay Catalog Information
- Adding Items in Bulk
- Printing Inventory Labels
- Adding Pricing Information to an Item
- Adding Product Information to an Item
- Editing Items
- Entering Categories
- Pictures
- Picture Storage
- Automatic Picture Processing
- Batch Changing Pictures
Managing Pictures on an Item
Items sell better with good quality, detailed pictures. Some sites allow for the seller to provide pictures and some sites provide the pictures. For example, eBay allows the user to submit their own pictures and Amazon retrieves pictures from its own catalog. Please see Site_Differences_with_Pictures for more information on how each site handles pictures.
An unlimited number of pictures can be entered into each item record. Whether the pictures are sent to the site or not depends upon whether the site accepts pictures.
|
|
Not all sites will accept an unlimited number of pictures in a listing. In the event that a site only supports X amount of pictures, only the first X pictures will be sent with an item submission. |
Pictures on the Item Edit window are managed from the Carousel and Pictures tabs.
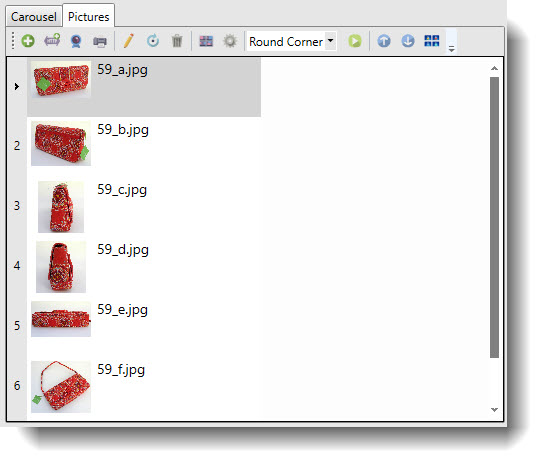
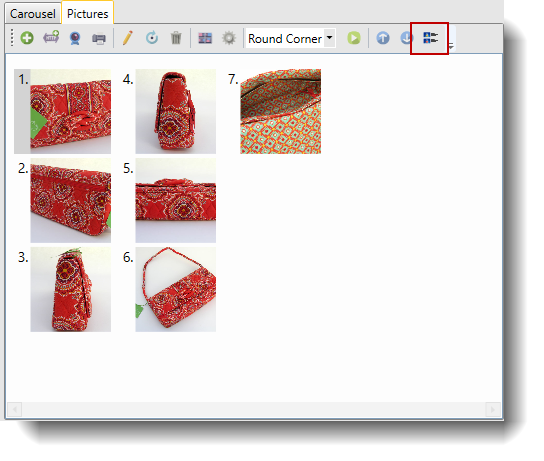
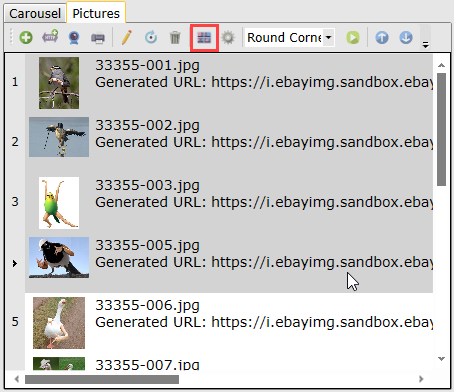
Pictures Tab
From the Pictures tab pictures can be easily managed.
The pictures grid shows a thumbnail, the filename and the URL where the picture has been uploaded if applicable. Pictures are ordered from top to bottom and can be dragged and dropped to change their order. A toolbar at the top provides access to features as described in the following table.
| Icon | Function | Description |
|
Add |
Choose pictures from the hard drive to add to the item. Pictures can also be dragged and dropped onto the carousel or Sell Items grid. |
|
|
Add from URL |
Choose pictures from a web URL to add to the item. |
|
|
Capture |
Capture a picture from a webcam. |
|
|
Scan |
Scan the picture from a scanner. |
|
|
Edit |
Open the Picture Editor for more advanced manipulations like rounding corners, drawing text or lines, or adding other image effects. |
|
|
Rotate |
Rotate the selected pictures |
|
|
Delete |
Delete the selected pictures |
|
 |
Stitch Images |
Stitch the selected pictures together into a single image |
 |
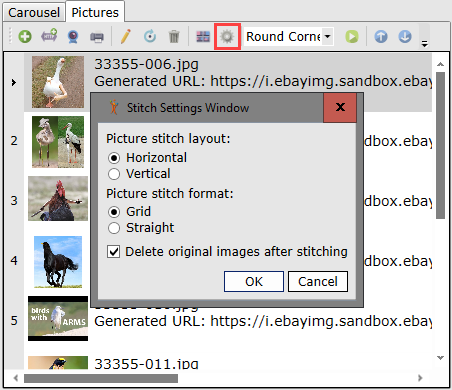
Define Stitch Settings |
Tell SixBit how to stitch your images |
|
Play Macro |
Plays the selected image macro from the drop-down |
|
|
Move Up |
Move the current picture up in the order |
|
|
Move Down |
Move the current picture down in the order |
|
|
Toggle View |
This toggles the view between a spreadsheet view that includes the name and URL to one that just shows the pictures.
|
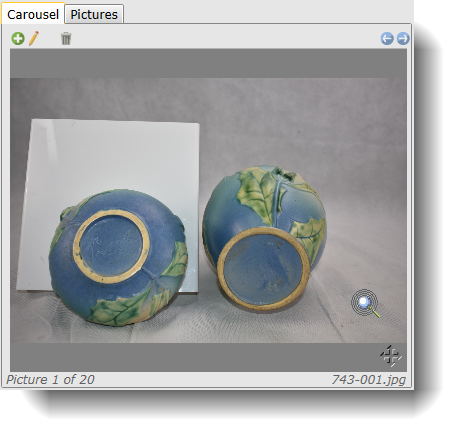
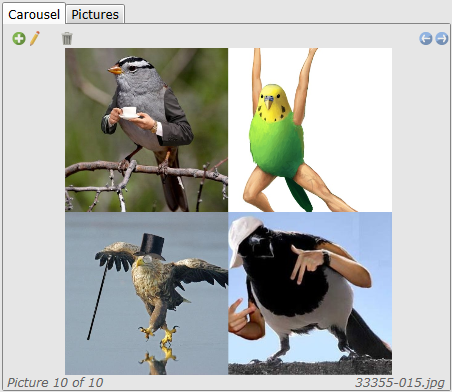
Carousel Tab
The Carousel tab acts as quick reference to see pictures. If the item uses Variations, then you will also have a picture carousel for variation pictures on the Variations tab. It has all the same functions as the regular item picture carousel.
The Picture Carousel offers some simple functionality from icons or the right click menu as described in the following table.
| Icon | Function | Description |
|
Add |
Choose pictures from the hard drive to add to the item. Pictures can also be dragged and dropped onto the grid. Picture URLs can also be added this way. |
|
|
Add from URL |
Choose pictures from a web URL to add to the item. (Available from the context menu by right clicking) |
|
|
Edit |
Open the Picture Editor for more advanced manipulations like rounding corners, drawing text or lines, or adding other image effects. |
|
|
Delete |
Delete the selected pictures |
|
|
Previous |
Display the previous picture |
|
|
Next |
Display the next picture |
|
 |
Toggle Viewfinder | Opens the Viewfinder module. Zoom into images to inspect details without opening the Picture Editor |
Viewfinder controls
Using the viewfinder, with the mouse over the image, use the scroll wheel to zoom in and out, and click-and-grad to pan. Additional viewfinder controls below:
| Icon | Function | Description |
 |
Back | Navigate between last used views |
 |
Forward | Navigate between last used views |
 |
Home | Focuses viewfinder in top-left corner |
 |
Fit image in bounds | Fit image to bounds on longest side, shows whole image |
 |
Fill image in bounds | Fit image to bounds on shorest side, zooms in |
 |
Center Viewfinder | Center viewfinder at any zoom leve to the center of the image |
 |
Close Viewfinder | Closes the viewfinder controls |
Once pictures are entered, users can:
- Force pictures to be resent with the next submission
- Rebuild the thumbnails
- Move manual URL's into the database
- Stitch multiple images into one image
If required by the site, pictures will be uploaded the first time an item is submitted. To improve the listing speed, subsequent submissions will not re-upload the pictures. If the pictures have been changed and should be re-uploaded the next time the item is submitted, a resubmission can be forced.
To force pictures to be resent with next submission:
- Open the Sell Items mode. How?How?
- Select one or more items from the grid that will have the pictures resubmitted.
- Right click the grid and choose Pictures|Resend Pictures with Next Submission.
Thumbnails are created when pictures are added to an item from either a file or URL. If the pictures have been changed, a rebuild of the thumbnails can be forced.
To force a rebuild of the picture thumbnails:
- Open the Sell Items mode. How?How?
- Select one or more items from the grid that will have the pictures resubmitted.
- Right click the grid and choose Pictures|Rebuild Thumbnails.
When manual URL's are provided, the pictures will not be stored in the database. To convert pictures from a Manual URL to a picture stored in the database use the Move Manual URL's to Database feature.
To move manual URL's to the database:
- Open the Sell Items mode. How?How?
- Select one or more items from the grid that will have the pictures resubmitted.
- Right click the grid and choose Pictures|Move Manual URLs to Database.
- Open the Sell Items mode. How?How?
- Click on the Pictures tab.
- Select a group of images using either Shift-click or Control-click
- Click the Stitch Images button.
- (Optional) Users can change the settings SixBit uses to stitch images by clicking the Define Stitch Settings button