See Also
- Cancelling Orders
- Recording Missing Shipments
- Processing Returns
- Marking an Order as Shipped
- Recreating an Order
- Notifying Drop Shippers
- Customizing Drop Shipper Notifications
- Recording Tracking Numbers from Drop Shippers
- Adjusting Costs
- Receiving Payments
- Insuring Shipments
- Deleting Online Pictures
- Creating Orders
- Processing Orders
- Combining Orders
- Leaving Feedback
- Printing Packing Lists
- Printing Postage and Carrier Labels
- Sending Shipping Notifications
- Shipping an Order
Splitting and Combining Shipments
Some eCommerce sites, such as eBay, will automatically combine all of the sales for the same buyer into one order. This is very helpful in keeping track of what needs to be shipped and to who it needs to be shipped.
All items that are combined, however, are also combined into a single shipment. In most cases, this is fine, but sometimes you may need to spread the items across multiple shipments. Reasons for splitting an order into multiple shipments include:
- they are all too big to fit in one box
- by shipping in separate flat rate boxes, shipping may be cheaper
- all items may not be shipped at the same time
- all items may not be shipped to the same location
The good news is that SixBit allows you to easily split items in an order into multiple shipments. Once they are split into multiple shipments, you can then print separate packing lists, postage labels, and even purchase separate shipping insurance.
If you mistakenly create multiple shipments, you can easily recombine them as well.
- Open the Ship Orders mode. How?How?
Select the Awaiting Payment or In Process status. You can only split shipments before they have been flagged as shipped.
- From the grid, select the order will be split.
| You can use the filter row or automatic filtering to quickly locate the order based on the buyers name or other information. The filter row will allow you to enter a name or other information to search for, and automatic filtering will allow you to choose from a list of names. |
- Double-click the row or click the Edit Order button to open the order record.
- Click the Duplicate Shipment (
 ) button to create a new empty shipment.
A new empty shipment will appear below the original. The
Ship To address and Shipping method will default to the same as in
the original shipment, however, may be changed.
) button to create a new empty shipment.
A new empty shipment will appear below the original. The
Ship To address and Shipping method will default to the same as in
the original shipment, however, may be changed.
| The default Actual Shipping amount on new shipments can be set from Options|Creating Orders. |
- Select any sales to be moved, then right click the grid and choose Move Sale(s) to next Shipment.
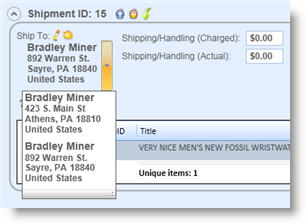
- The Ship To address is actually
a drop down list of all previously recorded addresses for the buyer.
If the new shipment should be sent to a different address, choose
it from the Ship To drop down.
If the address does not exist, use the New
Address (
 ) icon
to create the new address first.
) icon
to create the new address first.
- Enter the Shipped By method for the new shipment, if it is different.
- Adjust any other fields, as required.
| The weight fields are adjusted as items are moved between shipments, however they may need to be modified slightly to make allowances for the packing materials. |
- There are now separate shipping records for each shipment. Use the buttons above the list of items in each shipment to print packing lists, print postage, or purchase insurance for each individual shipment.
- When viewing the Edit Order window
with multiple shipments, click the Combine
Shipments (
 ) icon
above the shipment for which all other shipments will be combined
into.
) icon
above the shipment for which all other shipments will be combined
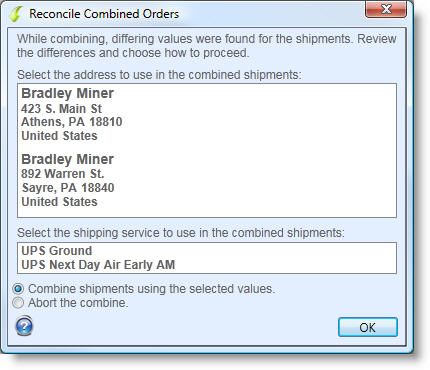
into. - If the addresses and/or shipping methods for the shipments are different, select which addresses and/or shipping methods will be used for the combined orders.
- Select the preferred values and click OK.
- Click the Delete Shipment (
 ) icon above the empty shipments to remove
them.
) icon above the empty shipments to remove
them.